
Your reader’s journey, booking statuses, and everything between through the lens of a situation that should be very familiar to you – checking a bag at the airport.
Before we start
If you’re getting clicks that don’t convert into bookings or earnings right away, it can feel confusing. That’s why we’ve created a guide that clarifies each step from click to payout.
Here’s what we’ll cover:
- Why a click doesn’t always turn into a booking
- Why a booking won’t appear in your analytics immediately
- Why payouts come weeks after the booking happens
Let your data’s journey begin
1. Creating an affiliate link = packing your suitcase
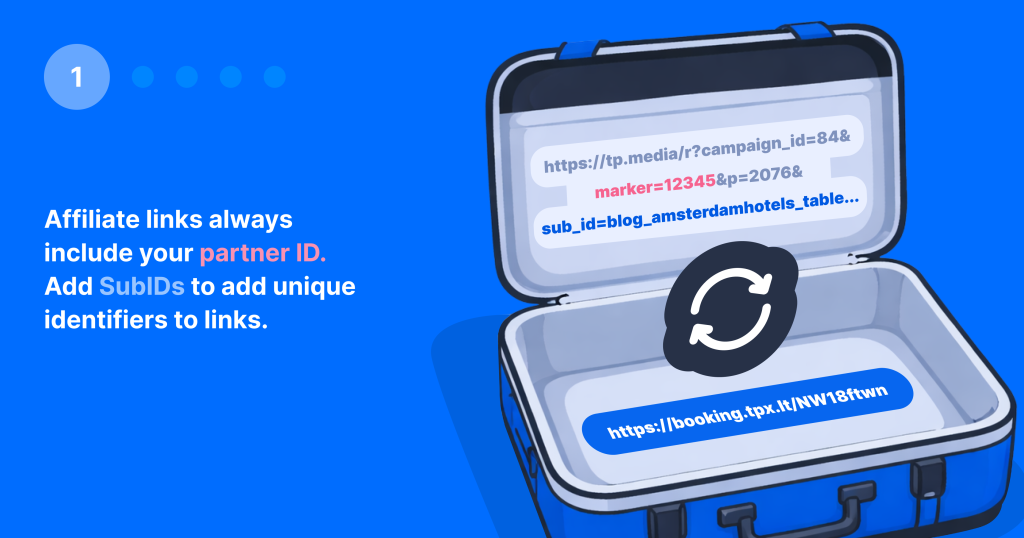
The first step in tracking is to create an affiliate link and add it to your content. Think of it like packing a suitcase for a trip. When you create an affiliate link, you’re automatically adding your partner ID. This means that whenever a user clicks that link, the system will recognize it as yours and credit the booking to your account.
You can also use SubIDs to distinguish different placements within your content. This lets you check where a user comes from, like argentina_instagram_post or germany_blog_post. All links created in your dashboard using the Link Generator or created by Drive are set up correctly by default, so you don’t need to double-check them.
Remember: this stage isn’t about earnings. It’s about making sure your links are set up for tracking.
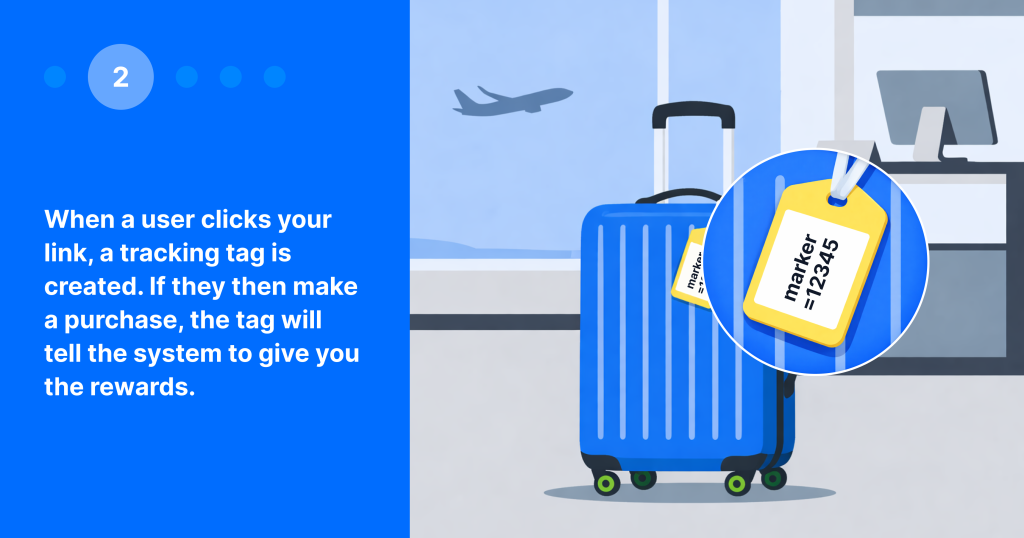
2. The click = attaching the baggage tag
When a reader clicks your affiliate link, the system attaches a tracking tag to their browser and stores it as a cookie. Think of it like attaching a baggage tag at airport check-in – from that moment on, the system knows who the tracking tag (the luggage) belongs to.
Now it’s time to define the attribution. Any booking made within the same tracking context can potentially be credited to you. However, several factors outside your control and ours could interrupt this process:
- Restrictive settings: Some browsers or privacy settings can limit or block tracking cookies. For example, if a user has strict privacy settings enabled, the tracking tag may not be saved.
- Private browsing: In private or incognito mode, cookies are not stored, so the tracking tag may disappear before the booking is completed.
- Browser hopping: Switching devices or browsers also breaks the connection. For example, if a user clicks your link on their phone but completes the booking later on a laptop, the booking won’t be attributed to you.
- Delayed booking: If a user waits too long before booking, the original tracking tag may expire and no longer be linked to your click.
Attribution follows a last-click rule: if a user clicks another affiliate link before booking, the last click gets the credit. Many “missing” conversions are not tracking errors but the result of tags getting lost, overwritten, or not being set in the first place. This depends entirely on user behavior, and it’s unfortunately something that’s out of your control.
Now that the attribution is set, it is important to remember that it will only work if the tag remains valid until the booking is made.
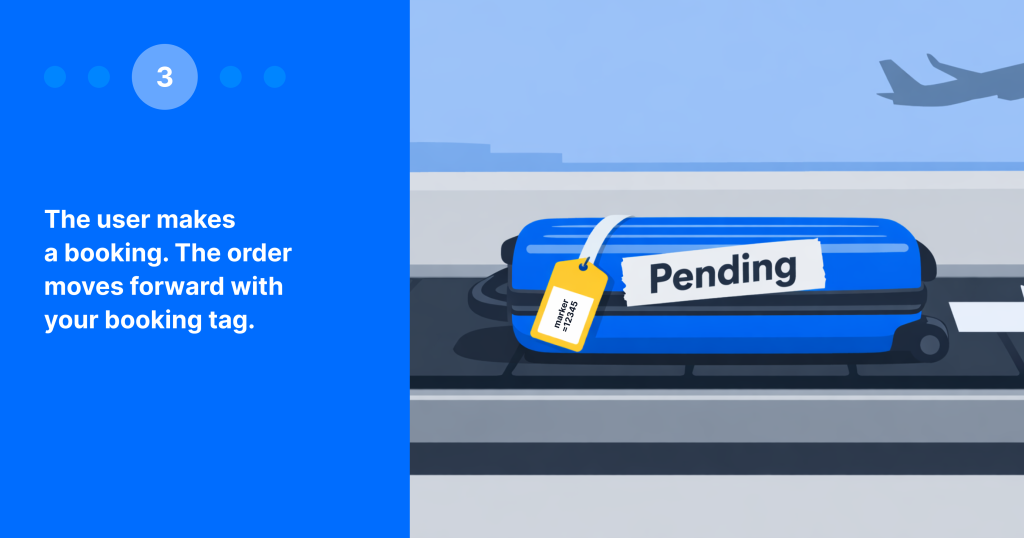
3. The booking = baggage being sent to the plane
When a user completes a purchase, the brand will receive all the details, including the affiliate attribution data, if the tracking tag is still valid. Think of this as the journey your luggage goes through between the check-in counter and the plane.
However, not every user completes their booking after clicking a link. Some abandon their carts, others compare options, and many are just indecisive. This is completely normal and you should learn to expect it. Travel purchases usually take several sessions and longer consideration periods, so users often come back later before making a final decision.
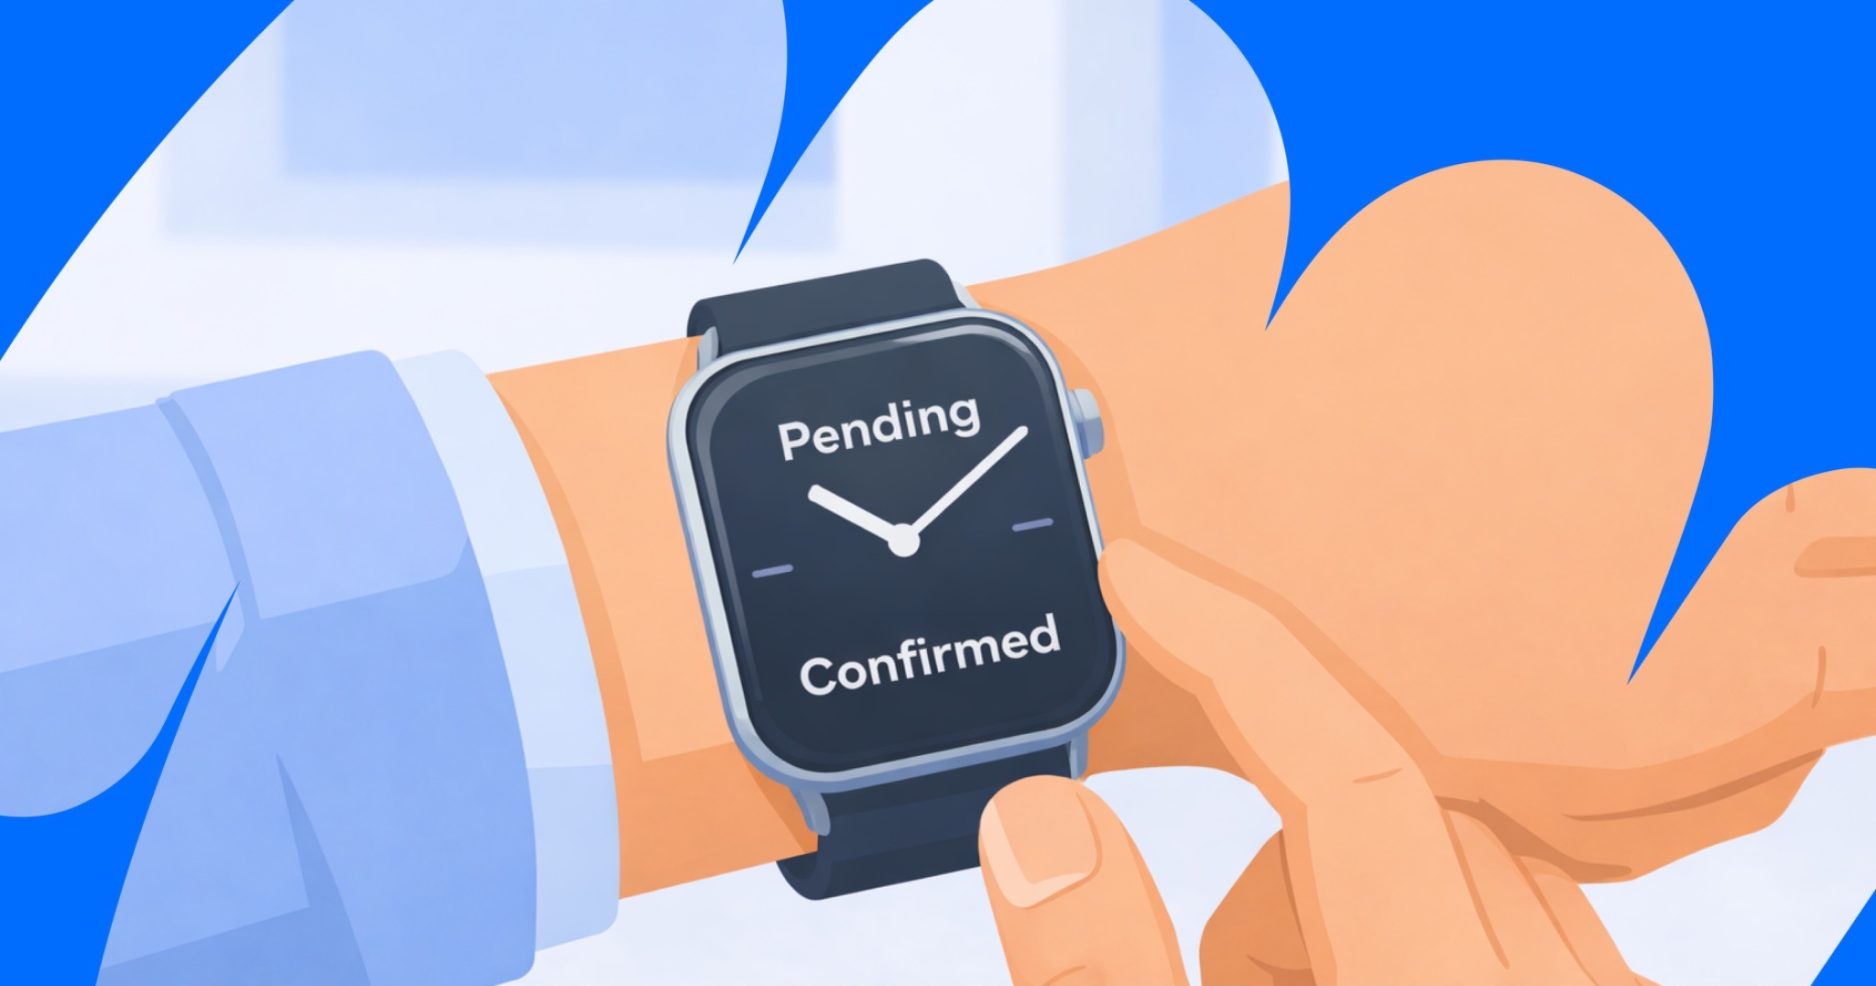
If all goes well and the user makes the booking, it’ll show up on your dashboard as Pending. This means the booking exists but hasn’t been validated or confirmed by the brand.
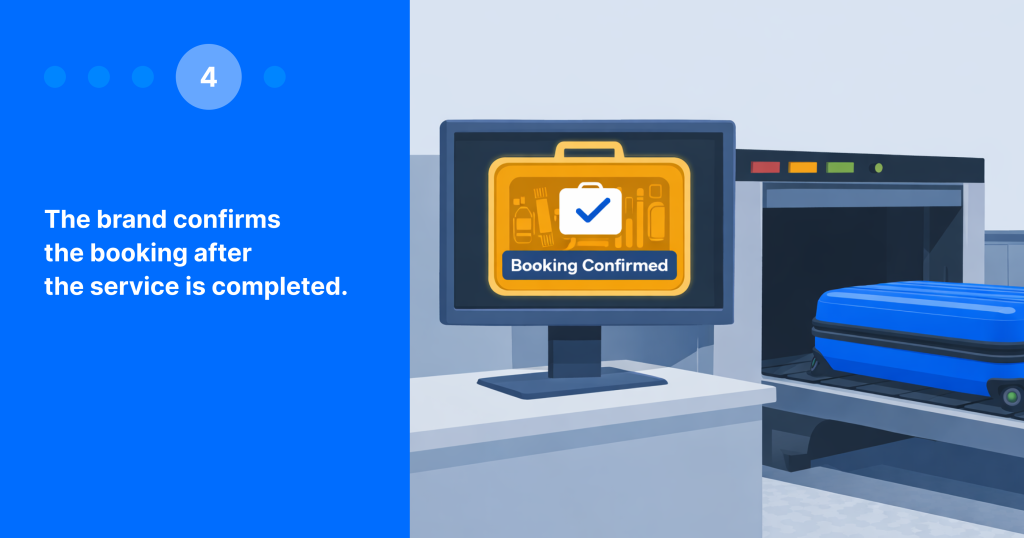
4. Brand validation = baggage going through security
This is the most important stage – and the one that often raises questions. Here’s how it works.
Once the trip is completed, the brand starts the validation process and checks the booking details. The commission gets approved only after the service is finished and everything is verified. This is similar to a suitcase going through security: it could pass through easily, be checked, or be held. You only see your suitcase again at baggage claim once it’s been cleared.
Brands do this to protect against cancellations, no-shows, refunds, and fraud. A booking made today could also be for a trip months later, so this step naturally takes time. Each brand has its own rules for confirmation timelines, payout schedules, and cookie lifetime. You can find the details for each program on your dashboard: go to any brand → Overview → Payout process.
There are three outcomes for a booking:
- Pending – The booking is still under review. This could mean that the trip hasn’t happened yet, or that the brand hasn’t completed validation. Earnings aren’t final here, and potential earnings may show up as zero. But that doesn’t mean you earned nothing; it just means the brand hasn’t shared the amount with us yet.
- Confirmed – The service was completed, the brand approved the commission, and the earnings are final (and yours!)
- Canceled – The booking was canceled or refunded by the user. No commission is paid.
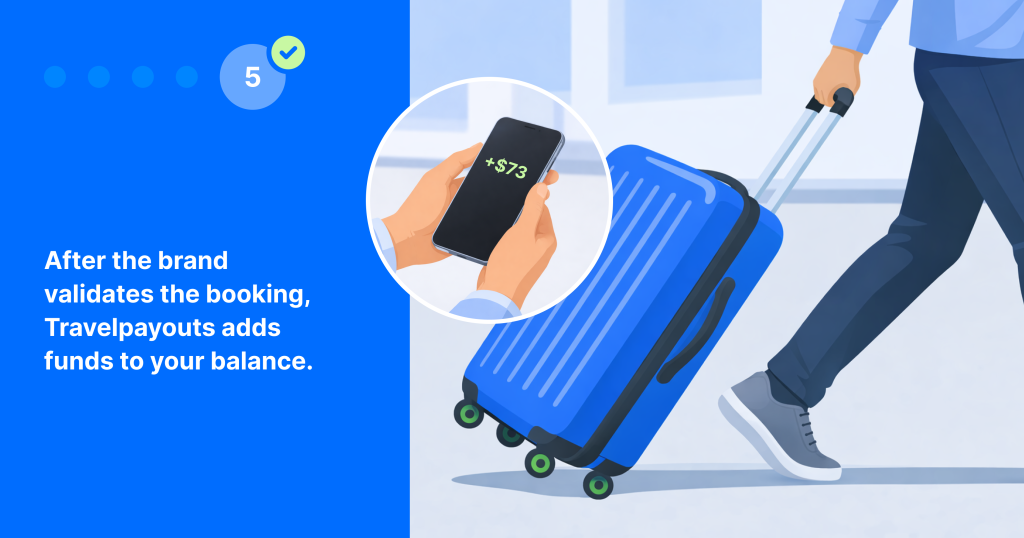
5. Payout = picking up your bag at the belt
Once a booking is Confirmed, we automatically add a reward to your balance. Now reward is officially yours!
Revenue is recorded in the month the booking is confirmed, not when the click or initial booking occurs. A booking made in June might not be confirmed until August, after the stay ends. It would then be included in the September payout cycle.
This delay is normal, as brands need time to finalize the stay and review all details before approving the commission.
Breakdown of the payout process for top brands
| Brand | Reward payout timing |
| Agoda | Within 2 months after check-out |
| Viator | Within 7 days after the event date |
| GetYourGuide | On the 5th day of each month for activities completed in the previous month |
| Trip.com | By the 15th of the following month after travel (flights, trains, prepaid hotels). Pay-at-hotel bookings may take up to 6 months after check-out |
| Expedia | Within 60 days after the customer completes their stay, rental, or activity |
| Klook | Within 60 days after the booking date |
| Booking.com | Within 60–90 days after check-out |
| Welcome Pickups | Once all rides in the booking are completed |
| Yesim | Within 30 days after payment |
| 12GO | After the travel date |
| Tripadvisor | For hotels: within 60 days after the clickFor activities: within 7 days after the event date |
One last thing before you go: make awesome content
Once you understand this system, you can stop guessing and start optimizing.
Not every “suitcase” makes it through, arrives on time, or with the tag still attached. But once you understand the process, you can see where and why this happens. If you experience any issues, check the Help Center or contact our support team.
So make great content, use your links well, and make sure not to take someone else’s suitcases at the airport.
Join the Travelpayouts partnership platform
Join todaybrands


