Why track outbound link clicks
Here is what you can learn after checking the number of clicks on outbound links:
- Calculate your conversion from website visitors to those who clicked on the link to your advertiser’s website.
- Compare the effectiveness of links that direct to the same website, but are placed in different articles.
- Compare the effectiveness of similar links with different anchors.
- Compare the conversion for different advertisers.
To understand how many users go from your blog to third-party resources, set up events in Google Analytics.
There are two ways to set up events:
- Add the tracking code directly to your blog.
- Set up analytics through Google Tag Manager.
The second method is easier, as you’ll only need to add the code once. Then, you’ll be able to set up all the events through GTM without adjusting the code on the website.
How to set up tracking of outbound link clicks in Google Analytics
If, for some reason, you find it easier to track clicks directly through GA, here is how you can set up tracking. First, connect your blog to Google Analytics (if you haven’t already).
1. Create a resource in GA. Find detailed instructions in Google’s guidelines.
2. Add the analytics.js tracking code to your blog pages. This code will look as follows:
<!-- Google Analytics -->
<script>
window.ga=window.ga||function(){(ga.q=ga.q||[]).push(arguments)};
ga.l=+new Date;
ga('create', 'UA-XXXXX-Y', 'auto');
ga('send', 'pageview');
</script>
<script async src='https://www.google-analytics.com/analytics.js'></script>
<!-- End Google Analytics -->
UA-XXXXX-Y — your individual tracking code.
If you have already connected your blog to Google Analytics, make sure that you’ve set up this tracking code exactly, as the script that we’ll discuss below only works using this code.
Tracking outbound link clicks in Google Analytics
To see internal link clicks on your blog, you can simply set up a standard tracking code. In order to send data on internal link clicks to GA, add the following script to the <head> after the tracking code:
<script>
var trackOutboundLink = function(url) {
   ga('send', 'event', 'outbound', 'click', url, {
 	'transport': 'beacon',
 	'hitCallback': function(){document.location = url;}
   });
}
</script>
Add the “onclick” attribute to codes of those links on the page with an installed script for which you want to track clicks.
<a href="http://www.example.com" onclick="trackOutboundLink('example.com');
 return false;">Открыть example.com</a>
How to check that tracking works properly
- Go to Google Analytics, choose “Real-Time Report”.
- Select “Events” from the drop-down menu.
- Click on a few outbound links on your blog.
- Return to Google Analytics and see if these events have appeared.
How to set up tracking of outbound link clicks in Google Tag Manager
If you want to manage all the settings in Google Tag Manager, you can remove GA tracking codes from your blog after setting up GTM. Your statistics in GA won’t be removed, because, in fact, you have simply changed the way of adding Google Analytics to your website.
1. Set up Google Tag Manager on your blog:
- Create a resource in Google Analytics.
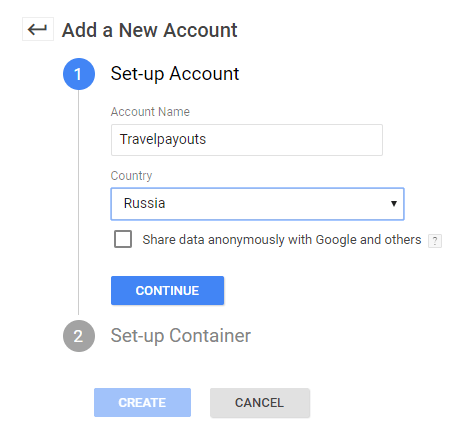
- Create a container in GTD following the instructions. Add the container code to your blog.
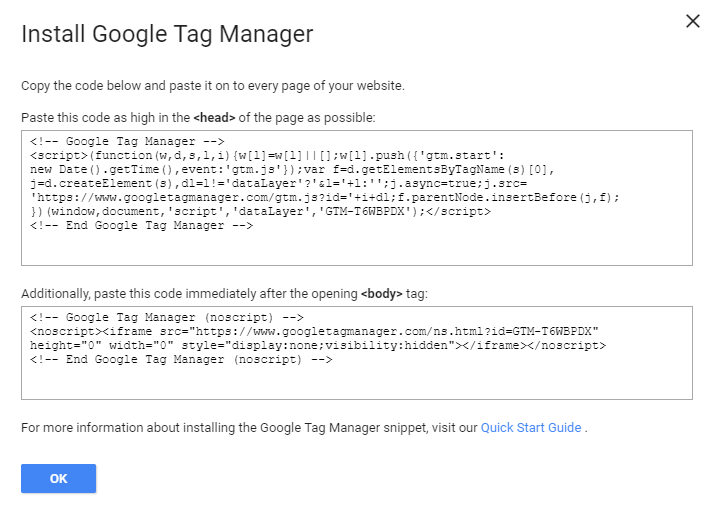
If your blog operates on WordPress, open the header.php file. Add the first code to <head> immediately after the opening tag. Add the second code to <body> after the opening tag.
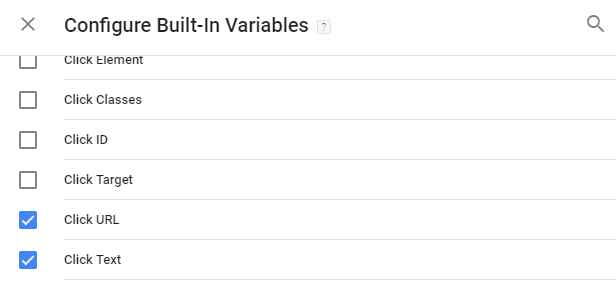
2. Activate built-in variables.
These variables are necessary for tracking link clicks.
- Choose “Variables” in the left sidebar.
- Click “Configure” in the “Built-In Variables” section.
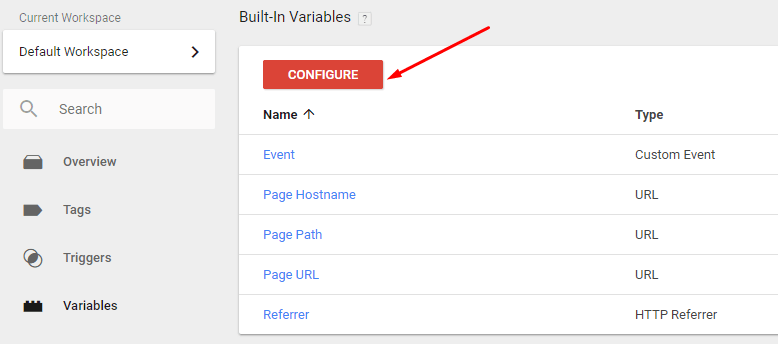
- Check the boxes labeled “Click URL” and “Click Text” in the dropdown menu.
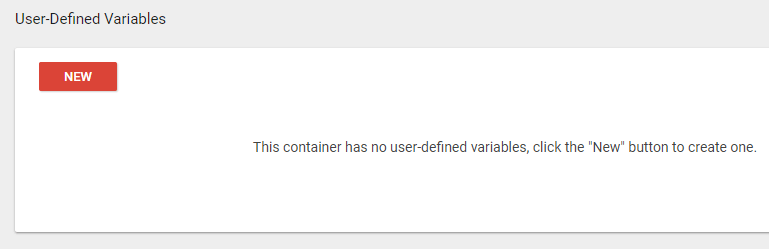
3. Add the Google Analytics ID to GTM as a custom variable. You can use it for all tags.
- Add the “Variables” menu item and click “New” in the “User-Defined Variables” section.
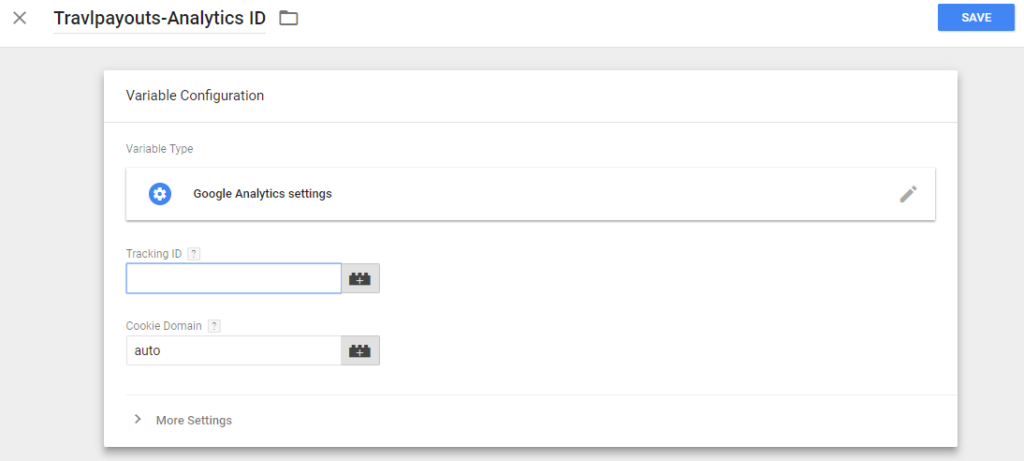
- Set a name for the new variable, such as “sitename (your project name) analytics id”. Click the pencil in the top right corner to edit. Choose the variable type: Google Analytics Settings.
- Add the tracking code from Google Analytics.
4. Set up page tracking through GTM:
- If the Google Analytics tracking code is set up on your blog or on the website, remove it.
- Create a new tag in Google Analytics. Tag type: Google Analytics – Universal Analytics; Track Type: Pageview; variable: sitename analytics id.
- Choose “All Pages” in the section with triggers.
5. Create a trigger to track outbound links:
- A trigger informs GTM that it’s necessary to install a tag. In this case, a trigger is a click on the outbound link.
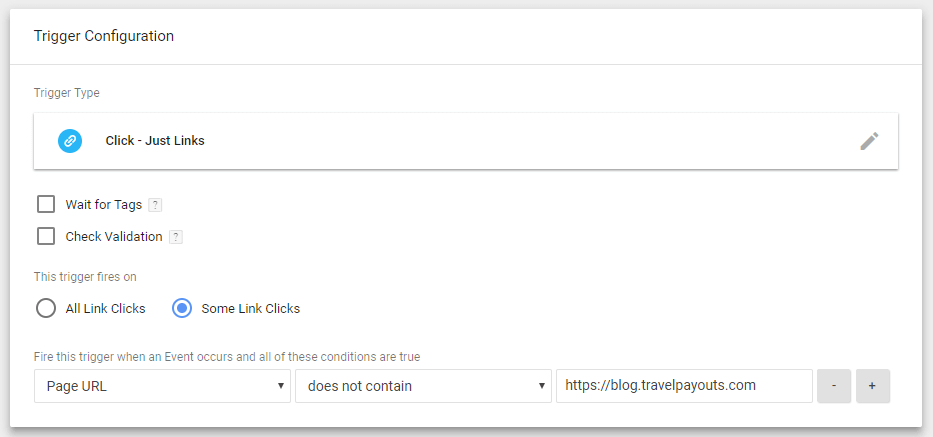
- Choose “Triggers” in the menu and click “New”. You can choose a trigger’s name, such as “outbound link click”.
- Choose “Just Links” as a trigger type and check the box “Some Link Clicks” in the “This trigger fires” section.
- In the settings, enter “Click URL→ Doesn’t Contain → /your website or blog URL/”. This is necessary to track only outbound links to third-party resources with this trigger.
- Save your trigger settings.
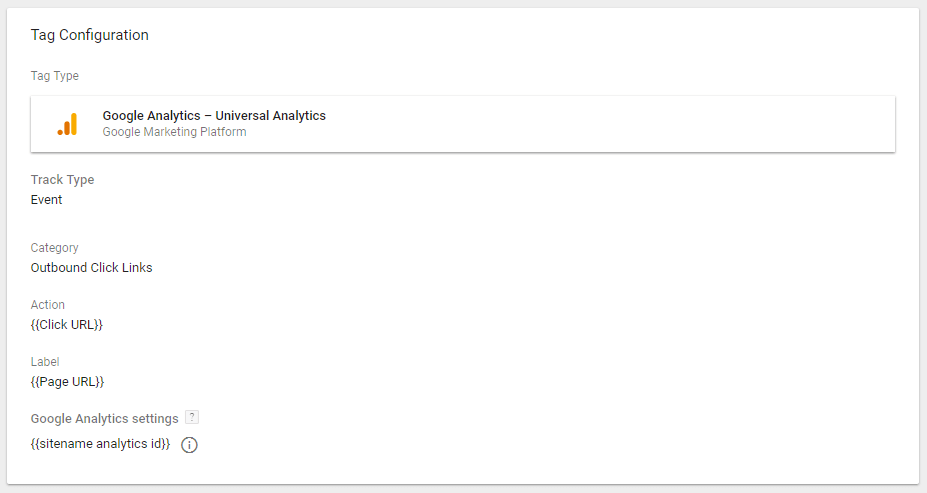
6. Create a tag for tracking outbound links:
- The tag will load when the blog user clicks on an outbound link.
- Create a new tag of the type Google Analytics – Universal Analytics using the sitename analytics id variable that you created in Step 3 and the “Outbound link click” trigger.
- Fill in the tag features as shown below. {{Click URL}} and {{Page URL}} are built-in variables that you need to choose from the dropdown menu.
- Track Type: Event
- Category: Outbound link click
- Action: {{Click URL}}
- Label: {{Page URL}}
- Non Interaction Hit: False
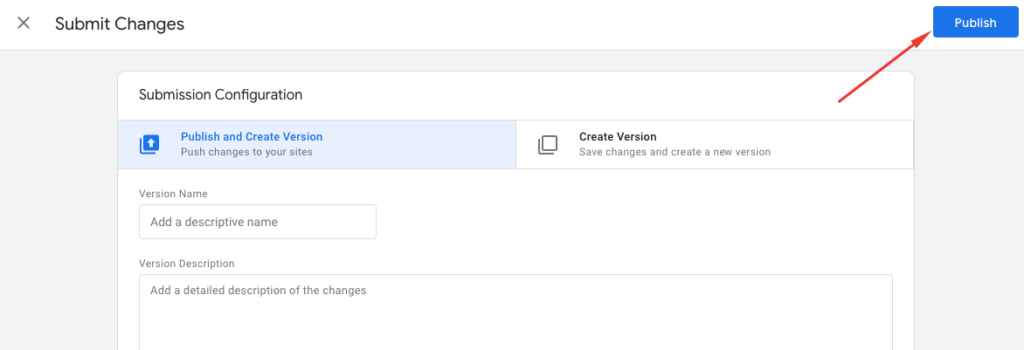
7. Publish the container:
8. Make sure that everything works properly:
- Open Google Analytics, choose “Real-time report”.
- Choose “Events” in the dropdown menu.
- Click on a few outbound links on your blog.
- Go back to Google Analytics and see if the events have appeared.
Do you track clicks on outbound links? Which method do you use and find best?